Saturday, December 31, 2011

Labels Schmabels


1172_Labels1

I really wanted clothing labels to sew into the clothing and other projects I make. I’ve seen some clever and cute ones on Etsy but the cost of having nice quality labels made just to sew into projects for my family’s use or for gifts is unrealistic. Well, this IS a D.I.Y. blog, right? So I tried to make them myself!  I used special fabric made for inkjet printers, made by Avery and purchased at Wal-Mart. I’ve seen several different methods and tutorials for D.I.Y. labels but I decided to just follow the instructions on the package. I designed the labels in my graphics program (Paint Shop Pro), printed them out and then cut them apart using my rotary cutter. I made little external seam tags as well as longer tags meant to go inside clothing, purses, etc. They turned out sorta cute but I still consider my labels a craft FAIL. My three mistakes were: using the color red (it fades to orange when rinsed), the length of the inside label is much too long, I didn’t use fray check and the labels are a little thready. I haven’t given up though, I will try these again soon!

1172_Labels2

Thursday, December 29, 2011

Behind The Times


Here I am, just days away from the new year and I’m posting my Thanksgiving crafts. I do have a perfectly valid excuse since I nearly died on Thanksgiving Day but it’s time to get back into the swing of things and get this blog off the ground. I’ve actually been crafting quite a bit while recovering from my injury, I just haven’t been posting the results! I will, I promise! Today I’m sharing a couple of sewing projects I did for my two youngest kids for Thanksgiving.

Slice O’ Pie

As I was sewing my daughter’s dress (you’ll see it next) I was feeling guilty about not making something special for my 9 year old son to wear. I knew he wouldn’t appreciate anything too fancy, stuffy or dressy so when I saw this t-shirt over at Random Thoughts of a Supermom, I thought it was perfect!  

randomthoughtsofasupermom1

I knew I could whip one of these up easily and I knew my son would think it was pretty cool! Here is mine:

1172_ThanksgivingTshirt

Excuse my awful photo, I really thought I’d be able to get a super cute picture of my son actually wearing the shirt and hadn’t originally planned to share this “for my files” snapshot. Sadly, due to my little accident, I wasn’t able to get any photos of him wearing it. As far as constructing the shirt, I did not deviate much from Kelli’s version. I didn’t have a large enough piece of felt for the pie pan except in white so I improvised and made a plate using some ready-made piping around the edge to make it stand out from the white shirt. I also added “It’s a pie thing”. Every piece of the pie and every single letter was hand-stitched on to the t-shirt. I completely forgot to put the cool whip on the slice of pie. Actually, I didn’t forget. I was going to sew it on at the last minute but ya’ll know what happened….I nearly died so that little slice of pie when unadorned but I don’t think it made the shirt any less cute. My son loved it!

Thanksgiving Day Dress

Back to my main project – making my little princess a dress to wear on Thanksgiving Day. I picked up McCall’s M6387 pattern at JoAnn’s, on sale for $1.29! I bought my fabric at JoAnn’s as well:

1172_ThanksgivingFabric

How CUTE is that fabric?? Again, forgive the awful never-meant-to-be-posted photos.

It’s been a long time since I sewed and I’ve been just warming up so I was thrilled at how well this dress turned out and how easy it was to use the pattern. Look at my pretty stitches! My perfect ruffles! I was so proud of myself, it’s like riding a bike I guess! My only roadblock was the button holes. My sewing machine has a setting (I think?) to help make a rudimentary button hole but I couldn’t remember how and I no longer have the manual. I took the dress to a local sewing machine dealer/fabric retailer.  I asked the salesladies if they knew a seamstress who could make button holes and one of the kind ladies there made them for me on the spot. Dress done!

1172_ThanksgivingDressHem  1172_ThanksgivingDressTop

The dress looked absolutely precious on my little princess. I don’t have pictures of her in the dress for the same reason I didn’t take photos of my son in his shirt but trust me, she was the belle of the ball on Thanksgiving Day!

1172_ThanksgivingDress

I can’t wait to sew her a dress for Valentine’s Day but I’ll definitely have to figure out my buttonhole dilemma before then!

Wednesday, November 30, 2011

I Nearly Died


I haven’t blogged in two weeks but I have an excuse and I promise, it’s a good one!

I fell. Like 8 feet. Ok, it felt like 8 feet. I nearly died had to be rushed to the ER, at 1am on Thanksgiving Day!
Here is the scene of the accident:

See that top step?

Not quite 8 feet from the concrete but it was still far enough away from mother earth to cause me to nearly die significant injury.

Let me explain how I ended up nearly dying crashing to the concrete.
Three days before Thanksgiving my oven went kaput on me.
My landlord’s property management finally sent over a “repairman” to fix it on the day before Thanksgiving.
He was supposed to show up around 11am but didn’t make it until much later in the afternoon.
The repairman finished very quickly and left, just as quickly. I realized that he hadn’t actually TRIED the oven, just replaced a part but at that time, my son had an appointment so I had to skedaddle and didn’t even try it myself.
I still can’t believe he didn’t test the oven before leaving….what kind of repairman doesn’t test their repair??
Late that evening, as I begin to preheat my oven, I noticed the same fault code. <insert frustrated sigh here>

I wasn’t on the hook for Thanksgiving dinner as we were planning to go to my BFF’s house in Maryland but she demanded requested certain baked goodies and I was hell bent on providing those for her. I love my BFF and she rarely asks for anything tangible from me so I had to find a way.

*CLICK* (In my head that sounded like a light bulb going on but to you it probably reads nothing like that)

We have a monstrous travel trailer, sitting in the driveway, not being used…with a brand new OVEN inside! <cue heavenly orchestral music>. I sent the boyfriend out for propane, forgetting I have his debit card in my back pocket so a quick trip to get the propane turns into a double trip and it’s already late. He finally returns with the tank and we are ready to go!

My house oven is smaller than a regular sized oven but the travel trailer oven is even smaller so I know I’ll be up late into the night, baking in small batches but dammit, the BFF is gonna get her goodies! I’m determined!
I bake one loaf of banana bread. Hmm…a little burnt toasted on the bottom, but edible. The oven has a learning curve, as any new oven does, but I’m ecstatic as I scrape the bottom off that first loaf. I bake a second loaf, adjusting the time. A little less…toasty. Moving on, I start to bake cookies – 6 cookies at a time. Ugh. After carrying one tray into the house, I realize it will be a lot more convenient to just sit in the trailer until all the baking is done. I sat out there in the driveway until I was done with 4 trays of cookies and a tray of caramel turtle pretzels. Mission accomplished! Yay! It was late, well after midnight. Not wanting to wake anyone and not wanting to make several trips back and forth, I carefully stacked up the trays, the baking paraphernalia and the goodies. Bad idea. Bad, bad, bad idea. I’m sure you are seeing now where this is going!

As I step out of the trailer, I really can’t see the steps. Damn. It’s dark and my arms are fully loaded. I step one more time <cover your eyes here, if you’re squeamish> and plunge to my near death into the darkness. My life flashes before my eyes, cookie sheets crash loudly to the ground, cookies and caramel candies sail through the air and as my body makes contact with cement, I hear “THUD/CRUNCH/RIP”, all at once. I smash into the concrete pavement with my left shoulder, the only shoulder I have left that’s never had surgery. Damn. Then my head smacks the ground. Twice, just for good measure. Double damn.

The boyfriend heard the commotion, rushed outside and helped me up. I couldn’t move my arm at all and shortly after, I began throwing up until there was nothing but dry heaves left. He woke the kids, bundled us all into the truck and got me to the ER. They did a head and neck CT and x-rays and shockingly, even though I nearly died I took a hard hit, nothing was broken. Good news! The bad news? I’ve separated my AC joint and possibly torn my rotator cuff so I’ve got some physical therapy ahead of me. I’m ok with that. I’ll do nearly anything to avoid another rotator cuff surgery!

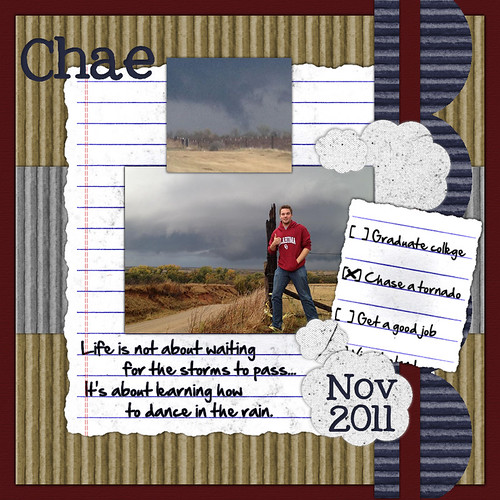
It’s been a week since the accident and the pain has lessened considerably. The function and mobility has also improved. Hopefully, I can upload the photos of my pre-injury projects soon. I also hope to start some new projects as soon as my shoulder can handle it. Did you notice those beautiful pallets under the trailer, in the photo, above?

I can’t wait to start that project but with my injury and the changing weather, it may be awhile.
I did work on one small paper project last night. I’ll try to get pictures and post about it tomorrow.

So…how was your Thanksgiving?? It had to be better than mine! I nearly died.

Monday, November 14, 2011

It’s Been Sew Long…

Years ago I used to sew, quite a bit.
I had a year of Home Ec (back when they still called it Home Ec) in junior high and again in my senior year of high school. I continued to sew here and there over the years – mostly curtains, tablecloths and Halloween costumes for my oldest son. Eventually my son realized all the other guys were dressing up for Halloween as “cool dudes” like Buzz Lightyear and mom was making him into things like a giant M&M, a baseball and a cow. That was the end of my costume sewing career. I didn’t even attempt to sew for my younger son, he is much pickier than his big brother. 15 years after my last sewing stint, my beautiful Princess arrived. A girl! Since she was born a little over a year ago, my mind has been filled with images of lace, ruffles, bows, tulle…frothy, girly concoctions just flowing off my sewing machine and into her closet. Recently I began to bookmark every frilly little girls clothing confection that I saw on the internet. I bought patterns. I oohed and aahed over dozens of etsy listings. It was time. Time to bring my poor neglected sewing machine down from it’s corner of the entry closet and give it a place of honor in my craft corner of the sunroom!

For my first “warm-up” sewing project, I chose to create a cover to protect my sewing machine and make up for all the years of neglect. I chose this tutorial because it seemed quick and easy and I loved the shape.

Did I mention it’s been close to two decades since I have sewn anything?
I should have chosen a plain, square pillow as my first back-to-sewing project!

It didn’t really take me that long to make the cover but I made so many errors and rookie mistakes.
I used this fabulously sturdy and lined drapery fabric that I received for free. (Stay tuned for an upcoming post on how I score free stuff!). Yes, you read that right. Lined. As in two layers. I instantly made this project much harder than it had to be by using two layers of fabric; However, the problem was not with the fabric – or the machine, the tutorial, the thread or any of the other things I was cussing at while sewing. The problem was my arrogance. I learned a lesson in humility working on this project! Despite my sewing history I am basically a beginner all over again, a lesson I learned the hard way.
With this project, one of my biggest mistakes was not giving myself enough seam allowance. The inside of the cover is the stuff nightmares are made of! I pinked the seams as best I could but it’s still a mess in there! And nope, I didn’t take photos. Trust me, you don’t want to see how badly I butchered this!
It does look kind of fabulous from the outside though!
You can rollover the image with your mouse to see the before/after.

Yep, stripes. One of those rookie mistakes I mentioned. Stripes are unforgiving to the inexperienced!
See the ric-rac? I had to add the red ric-rac because my tension was off and I really messed up my stitches but I was too frustrated by that time to rip it all out and start over. Isn’t that why ric-rac was invented anyway? To cover the goofs?
I love that this cover has a hole for the handle so I can carry it with the cover still on.
Even if making that handle hole made me cry like a baby. I’m over it now and loving it.

Always a glutton for punishment, I decided to use my leftover fabric to make a matching cover for my Cricut machine. Do you think I learned my lesson and changed my approach? No, of course not!
I’m stubborn and since the sewing machine cover was lined then by-golly, the Cricut machine cover should match!

Today, I begin my next sewing project and I plan to approach it with a lot less swagger! Here’s a sneak peek:

11seventytwo_sneakpeek1

Saturday, November 12, 2011

Coming “un”-glued…

Plain white school glue + water = homemade Mod Podge® or, as I call it, Un-Mod Podge.

UnModPodge

Somehow, once upon a time, I’m pretty sure I already knew this but forgot.
I forget. A lot.
My memory (or lack thereof) is why I take copious notes, bookmark everything
and have to check my calendar before I so much as sneeze.

The original Mod Podge® runs about $5 for 16 oz. I made a 16 oz. jar for $2.
$2 doesn’t seem like tremendous savings but it’s 60% less and has worked just as well for me, so far!
Bonus: I can spend the $3 I saved on more craft goodness!

{I’m not crediting or linking this idea to anywhere in particular since it looks like I am the only one
who forgot, this recipe is found all over Blog land.}

The only problem with making Un-Mod Podge is…the technique. It’s technical.
And involves several steps.

Step 1: Eat Salsa
Step 2: Clean the Salsa jar
Step 3: Paint the lid.
Step 4: Pour two 4oz bottles of generic white school glue into the jar.
Step 5: Add 8oz of water on top
Step 6: Screw on lid
Step 7: SHAKE!


See? I told you.
*wipes sweat from brow*
Complicated!

Friday, November 11, 2011

My Twisted Son

Today’s crafty share is a digital scrapbook layout.
I have dabbled in graphic design for many, many years –
way back when country-style web sets and leaving blog gifties
while blog-hopping was the norm and flashing blinkies were all the rage.

oldschoolblinkie


You remember these, don’t you? They were everywhere on the internet!
What were we thinking?
Were we trying to turn the entire world wide web into one giant Vegas strip?
(Pssst….I still “got it”, whipped this “old school” baby up in less than 3 minutes!)

In all of those years of designing web graphics and print graphics I doggedly avoided every forms of actual scrapbooking. I just didn’t get it and had no interest in venturing into either paper or digital scrapbooking. Fast forward to this century and now, well, I’m trying to expand all my crafty and creative horizons. Here I am, digi-scrapping for the first time. I’m not that good at it but I’m determined to master the craft so when I found out that the Bite-Sized Scrapbooking subscription is now free, I joined immediately. If you aren’t familiar with Bite-Sized Scrapbooking, it’s an email subscription service for people who think they are too busy to have time to scrap. You get three weekly emails that walk you through designing a layout with the goal of completing one layout a week. You can do traditional paper layouts, digital layouts or mix it up and do both! It’s GREAT. I’ve only just finished Week 1 and I already can’t wait to see what Week 2 brings. Unfortunately, the creator of the service will be discontinuing the service on January 27th so if you want to join, sign up NOW. I’m sad because I just discovered the service but I understand Kim’s reasoning, which she explains here, on her blog.

The subject of my first layout for Bite-Sized Scrapbooking is my 19 year old son, Chae. He’s away at college -- the University of Oklahoma, to be exact. (Boomer, Sooner!!). Chae watched the movie Twister for the first time when he was 5 years old and was hooked. For years he wanted to be a storm chaser/meteorologist. That plan changed as college approached but he still never lost his love of all things weather – especially wicked weather. The other day, Chae had an opportunity to scratch that tornado chase off of his bucket list. The photos and video he shared were amazing but I am very thankful he shared with me after the chase was over! This layout commemorates his crazy brave chase and celebrates the amazing things that can happen when we “dance in the rain”.

My Twisted Son

Inspiration LO: "Top Ten" by Kelly Goree.

Thursday, November 10, 2011

Brandy Builds a Blog, Take 2

Ask anyone who knows me.

I can't make a decision to save my life.

I will stand in the cleaning aisle of the grocery store for 20 minutes, trying to decide which laundry soap to buy. What if I choose the wrong one?
Will my clothes not smell like "me"?
Will my clothes be clean? What if that other one smells better? Works better? ARG.
It's typical of me. And so is the blog change.

I decided that I wanted to use Denim and Daisies as my personal blog.
The name didn't really reflect the style I wanted to associated with for this crafty/DIY blog. I liked the name but it's not original. I happened to Google it (which I should have done prior to setting up my blog the first time!) and found a clothing line called Denim and Daisies. Since I plan to incorporate sewing into my crafts I didn't want to blur that line so Eleven Seventy-Two was born.
It's more unique and I like it better for this purpose.

Eleven Seventy-Two does show up in a couple of other places on the internet but the format of the titles and the webpage contents are different than mine. In case you are wondering where Eleven Seventy-Two comes from - it's the month and year I was born. I think it makes a catchy and possibly brand-ready (in the FAR future) name.

If you have already subscribed to the Denim and Daisies blog or Facebook page for my craft posts then you'll want to unsubscribe and resubscribe over here at Eleven Seventy-Two. Or you can always opt to stay with both blogs and you'll get the crafty eye candy as well as the personal rants (don't say you weren't warned!) and cutie kiddie photos.

Whatever you decide, I'm happy to have you along on my journeys!

Tuesday, November 8, 2011

I Sewed Paper and I Liked It, I Liked It


DenimandDaisiesBanner2 

My fall banner is my first project entry on my new crafty blog and I’m super excited to share it because I really love how the banner turned out. My inspiration was this lovely banner at svgcuts.com.

thanksgiving-dinner-svg_01_LRG

Svgcuts.com has some fantastic svg files but for this particular banner I did not use their Thanksgiving kit, just copied the basic layout. The acorn and apple svg files are freebies from BeaOriginal, the pumpkin and the oak leaf are a freebies from SVGShop.com, both also excellent svg resources for those who cut things.  The other leaves came from one of my Cricut cartridges.

DenimandDaisiesBanner1

The only thing I had to buy for this project were the rings I used to attach the banner to my fireplace mantle. All the other elements came from my craft cabinet, including raffia that has moved around with me through 4 states and a foreign country. I used scrapbooking papers, foam spacers, the well-traveled raffia, and a length of brown bias tape I bought on clearance for mere pennies a few weeks ago.

First, I cut the letters and shapes out on my Cricut and used a white ink pad to lightly distress the edges. I layered the shapes and letters with the foam spacers and tied raffia tassels through the tag holes. I saved the best for last. I ran the completed cards through my sewing machine {shiver of ecstasy} to attach them to the bias tape. Sewing on paper was so much fun, I decided to run another stitch line. I might have done a third stitch if there had been room for one…ya know, just for extra reinforcement. One can never have too many stitches. Unless their on one’s body. And need to come out. Ew.

DenimandDaisiesBanner4

During the making of this banner, I learned a couple of things. I learned that I desperately need to do more research on distressing paper with ink pads. My hands were an inky mess and I smeared the ink on the paper quite a bit. You can see smears on my apple.

DenimandDaisiesBanner3

I {re}learned that raffia makes a big mess, too. I suppose that’s why I had a package of unused raffia for so long. Time helps one forget those little details.
I also learned that a fern is a handy tool to help separate and hold strands of raffia…

DenimandDaisiesBanner5

I hung up the banner this morning and I was really pleased with how it looks against the bricks. Surprisingly, my one year old Princess has left it alone. She has ruffled the raffia tassels a few times and she points at the banner a lot but she hasn’t tried to pull it down. Yet.

Autumn Banner

Blog project No. 1? Done.
Now if I could only figure out what to do with the rest of the living-in-a-rent-house-is-frustrating mantle!


Thursday, November 3, 2011

Welcome to Denim and Daisies, the DIY version!

I thought I’d introduce myself and also create my “About Me’ write up for my first post. My name is Brandy. I have three children and the “Denim and Daisies” is a nod to raising my sons and my daughter. I’ve happily raised boys for 19 and 9 years, respectively, but adding the daisies at nearly 40 years old was quite a welcome change.

I haven’t blogged since January 31, 2007 and that last post was titled “An Ode to Boogers”. A lot has happened in my life since that day I was lamenting boogers….an autism diagnosis, a divorce, a new relationship, three moves from three different states, a child who grew from mama’s boy to grown adult and a new baby. To say I’ve been thrown some curveballs is an understatement. I thought I knew who I was and what I was all about but the last four years have shown me that my journey in life and who I am is ever evolving. Through the changes and transitions I have relentlessly sought my niche in the world. I’ve been military brat, military wife, mother, ex-wife, girlfriend, scout leader. I’ve gladly worn many hats in my support of those I love but now I’m searching for the hat that belongs only to me.

In my search, I recently {re}discovered my love of creativity through that miracle known as Pinterest. I used to sew. I used to cross-stitch. I used to paint and refashion furniture. I used to create print and computer graphics. I used to do a lot of things that I loved but somehow on my life’s journey I lost those things and now I want them back! Pinterest reignited my creative passion and brought back the feelings of pride and accomplishment I used to have when finishing something I created, myself. So here I am. Throwing my new hat in the ring with the rest of the craft/DIY bloggers and sharing my experiences along the way. I promise to showcase my misses as well as the hits because I now know that celebrating the highs and recovering from the lows is part of what life is all about. I hope you’ll follow along my journey with me and I’d really love it if you decide to join in along the way. Cheer with me when something goes really right, laugh with me when something doesn't quite work out. Share your own projects, experiences and advice with me.

"Creativity is inventing, experimenting, growing, taking risks, breaking rules, making mistakes, and having fun.” — Mary Lou Cook

Let's invent, experiment, grow, take risks, break rules (LOVE this one), make mistakes, have fun and be creative, together!


Denim and Daisies